Here is a really great looking knights helmet which you can easily make from paper and glue for a fancy dress party, school play or to celebrate St George’s Day.
What you need
To make your knights helmet armour you will need:
* sheets of A4 white paper
* a pencil
* A glue stick or sticky tape
* scissors
Step 1 – colour in some sheets of paper
The first step is to colour in some of the sheets of paper to look like metal for your helmet. You can shade this roughly and quickly like in the picture below. Of course if you want to use paint, or a different colour you can of course choose to get creative! You can also use coloured.
Once you have coloured in your paper you need to cut one piece into four even strips. You will need to do this for more than one sheet of paper.
You can use a ruler to mark out where to cut and make sure they are equal sizes.
Step 2 – Glue the shape of your helmet
In the next stage you need to use strips to form the shape of your helmet. First, you will join, with your glue stick, two strips together to form the base of the helmet. It might be a good idea to measure it around your head, and glue it to the right size so it fits.
Once you have your circular base, start gluing strips all over the top of the base. You might need 9 or 10 – they should be glued on the inside of the base and overlap each other slightly until your helmet looks like the picture below.
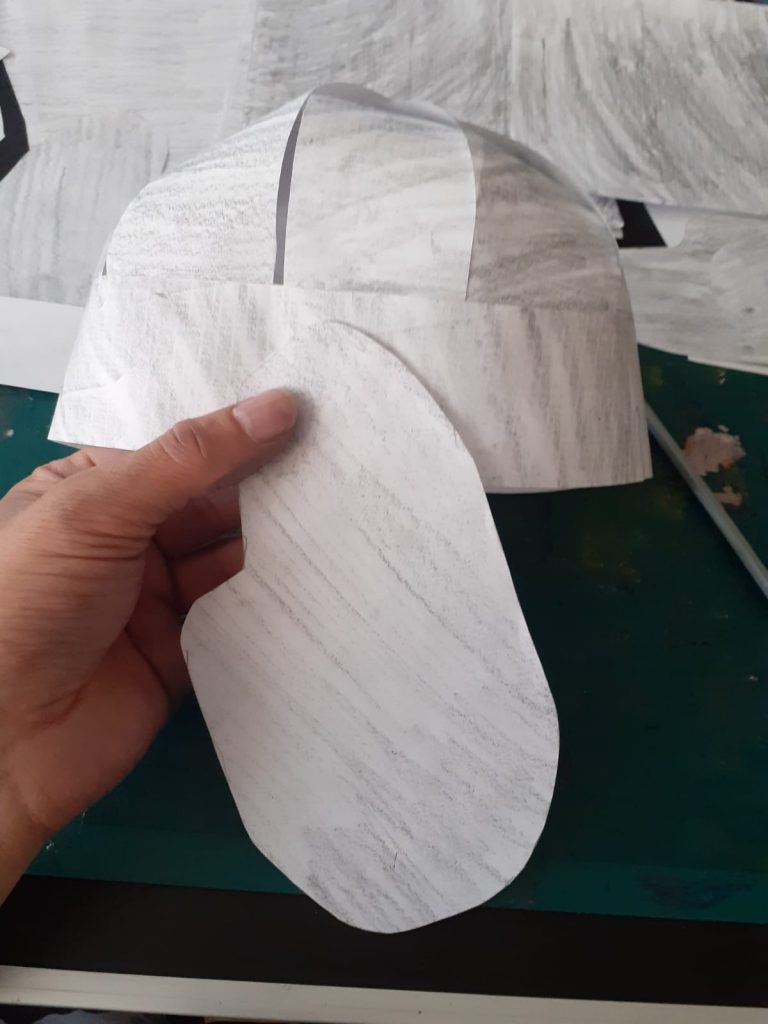
Step 3 – make your helmet ‘ears’
For the next stage, get another piece of coloured in A4 paper and put your hand down as a template. Draw round your hand, but leave out the fingers – it is just the shape without finger divides that you want! See the pictures below which illustrate this.
Once you have cut out the pieces you can then stick them onto the side of the helmet like in the picture – one each side.
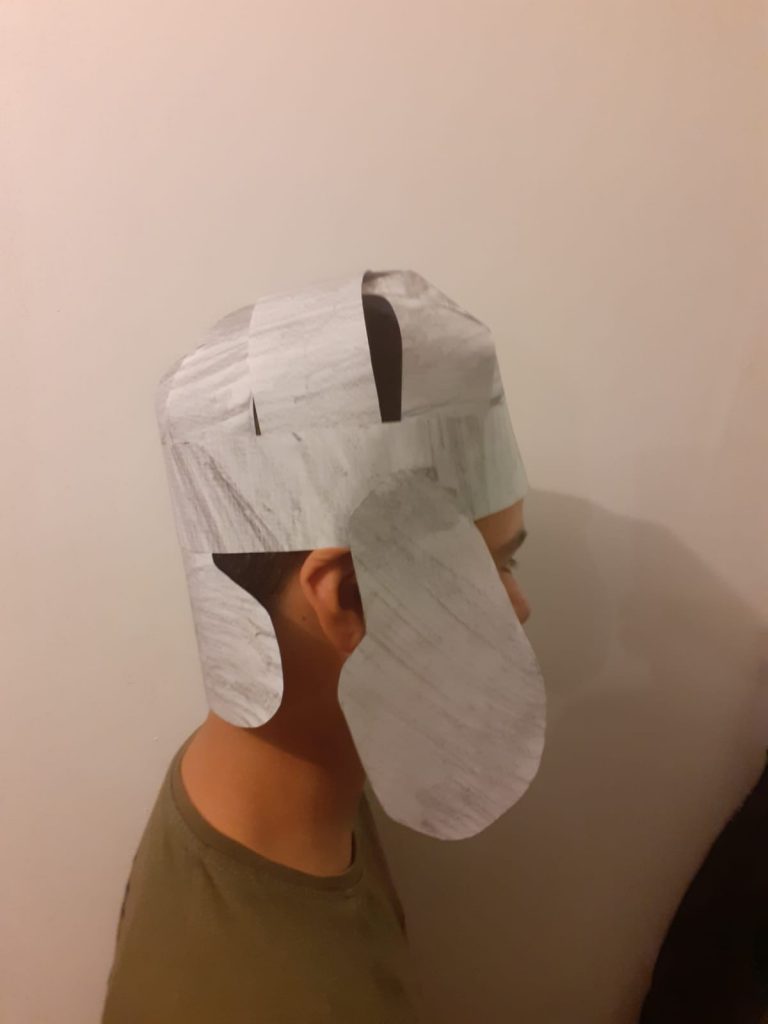
Step 4 – make the neck piece
Cut out two more templates from drawing round your hands, like you did for the “ear” pieces. This time you will stick them together to form one shape like in the picture. You will then cut a piece out of the shape, and stick it on to the back of your helmet, but inside the helmet.
Step 5 – make the helmet visor
To make the helmet visor you can cut out a diamond shape and fold it in half, top point to bottom point. Then use a pencil to measure out roughly the size of the slits in the visor you want to make.
Cut out the slits, and then fix each side of the diamond to the edges of the helmet. This makes your finished helmet!
Well done!! You now have a Knight Helmet.
Have fun making and playing with your Knight’s Helmet. We would love to see you all dressed up so do tag us in your photos on social media!