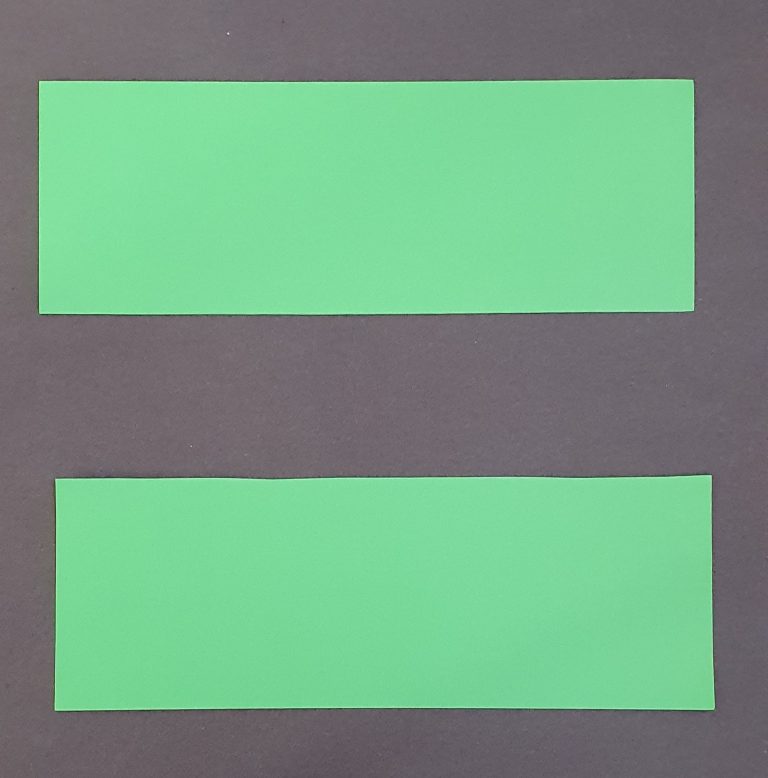
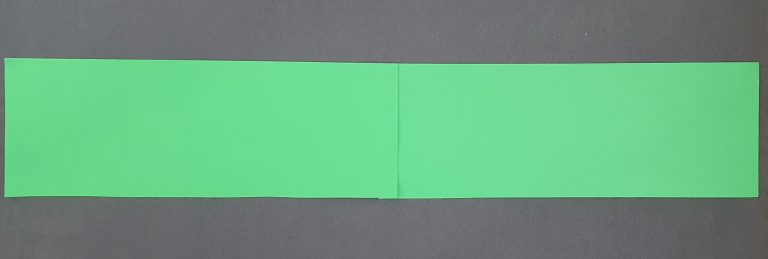
Cut a sheet of green A4 paper in half horizontally and glue together with a 2cm overlap to make a long strip like the image below. This is the headband. Put the strip around your head to see if it fits. You may need to add another strip if it doesn’t fit.Keep aside.
If you do not have green paper then you can use white paper and colour it green or use whatever other colour paper you have.
Step 2-Draw the horse
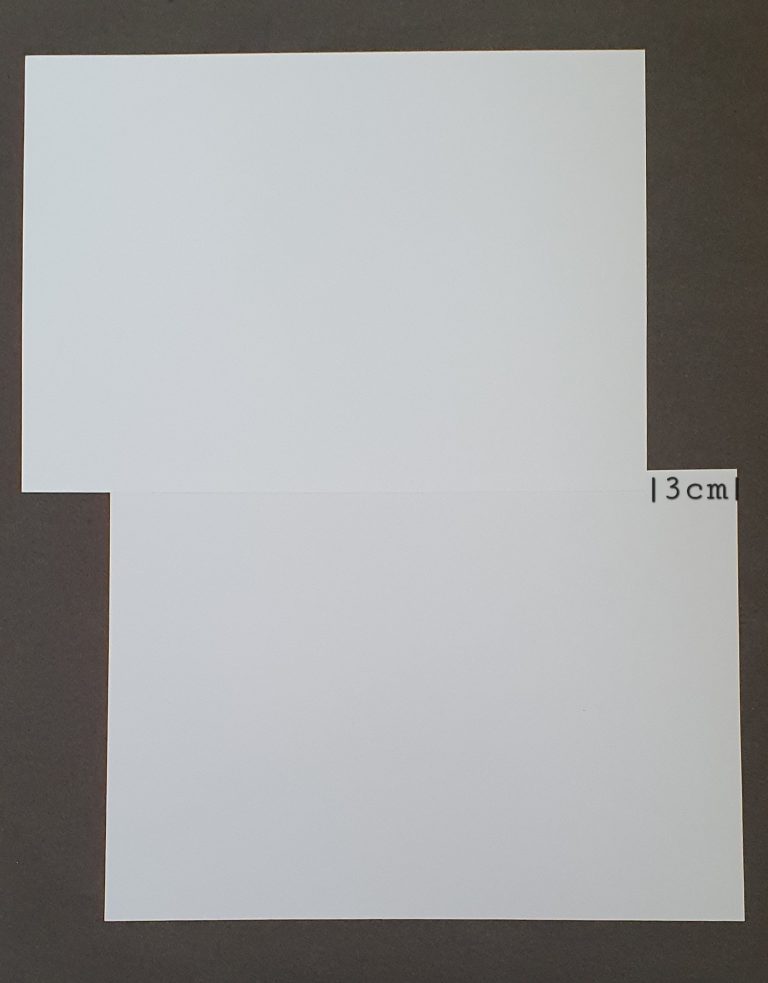
2a. Place two sheets of white A4 paper together horizontally with a 1cm overlap. Slide the bottom sheet of paper 3cm and glue it in position. See below
2b. On another sheet mark 6cm on the bottom edge and mark 21cm along the long edge. Then using a ruler draw a line joining the two marks so it looks like a triangle. Now cut out the triangle. See pictures below.
2c. Mark 4cm on the bottom right hand corner of the sheet you joined in 2a. (see the image below to help you) then join the triangle shape with a 1cm overlap.
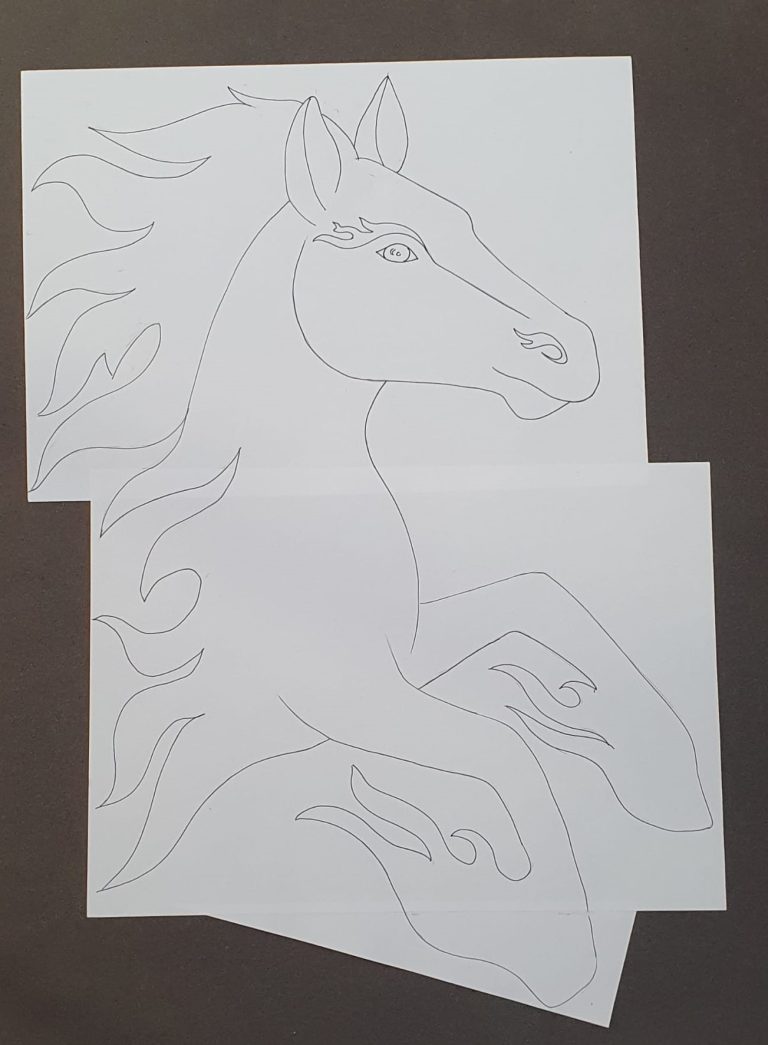
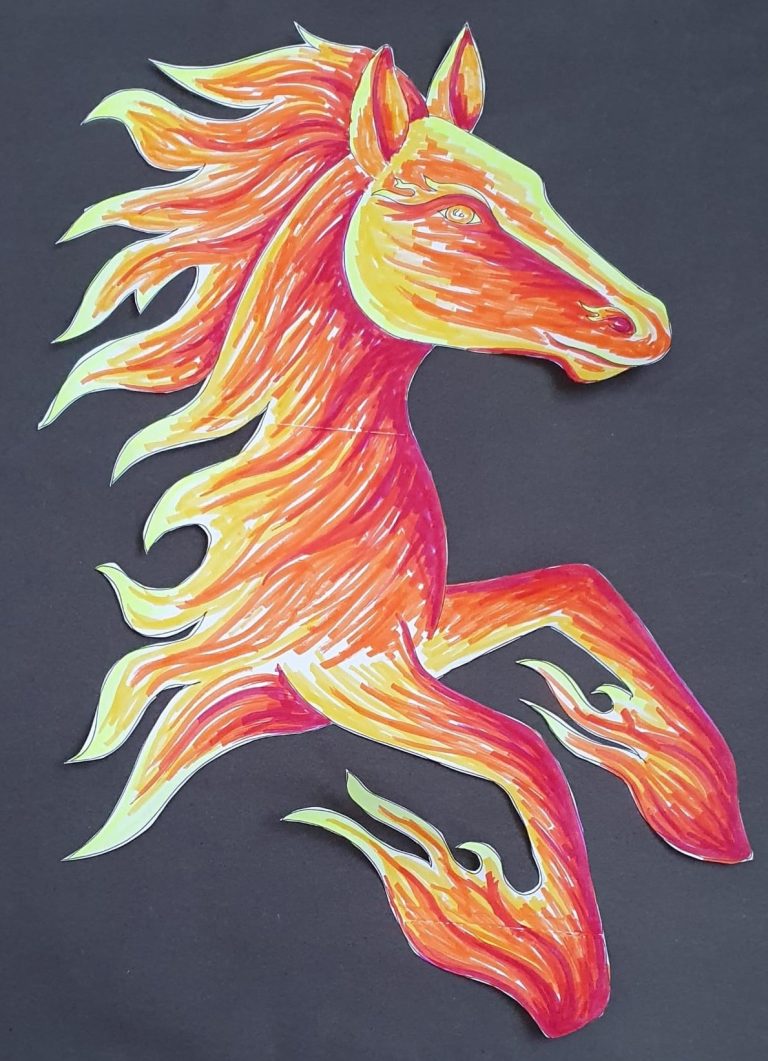
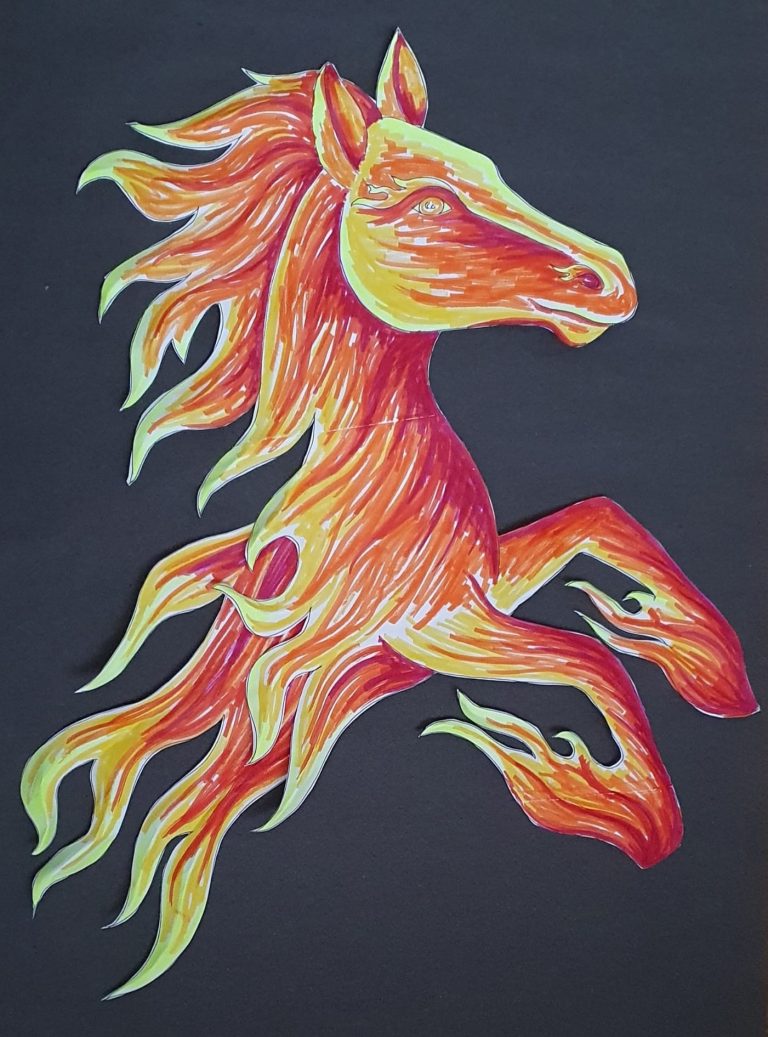
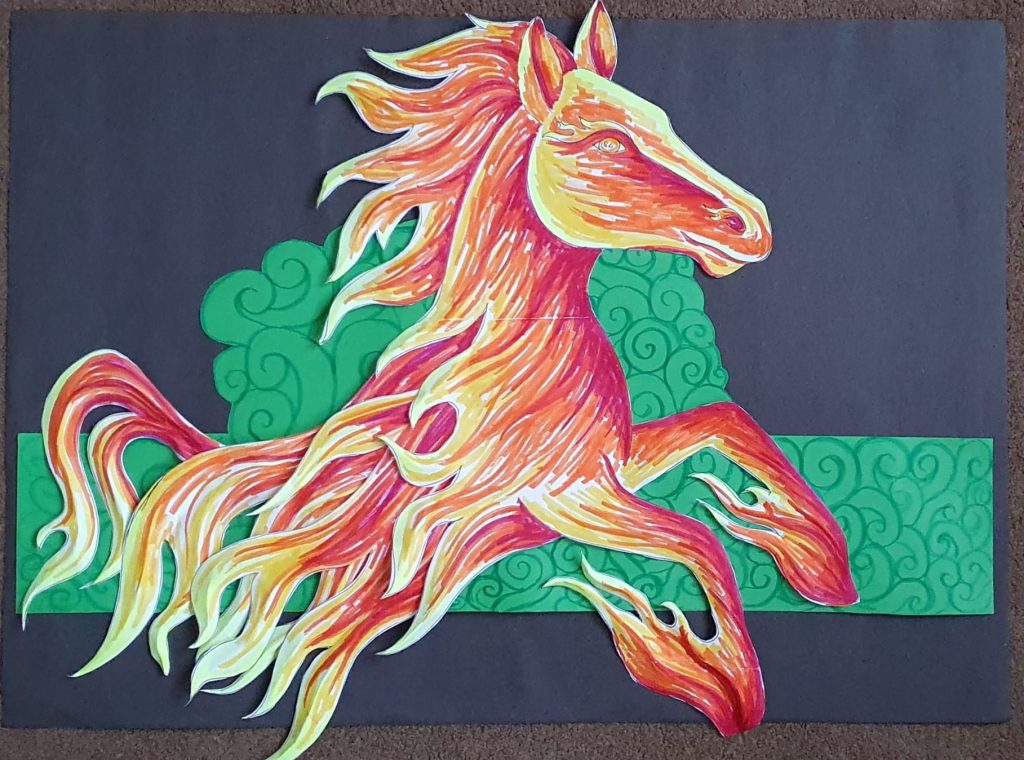
2d. On the sheet that you have joined, draw, colour and cut out a horse head and front legs finishing off with flames at the end. You can add additional flames around the eyes, nose, hooves if you would like. This is the main horse shape.
Step 3 -Draw flames to make the body
of the horse.
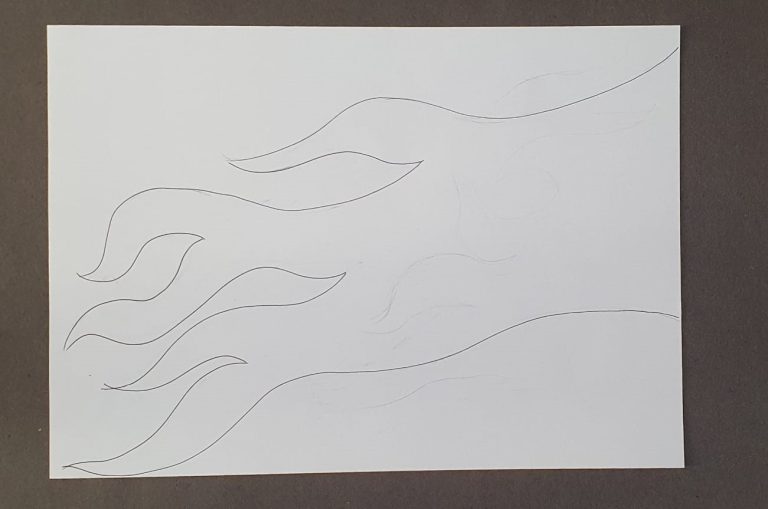
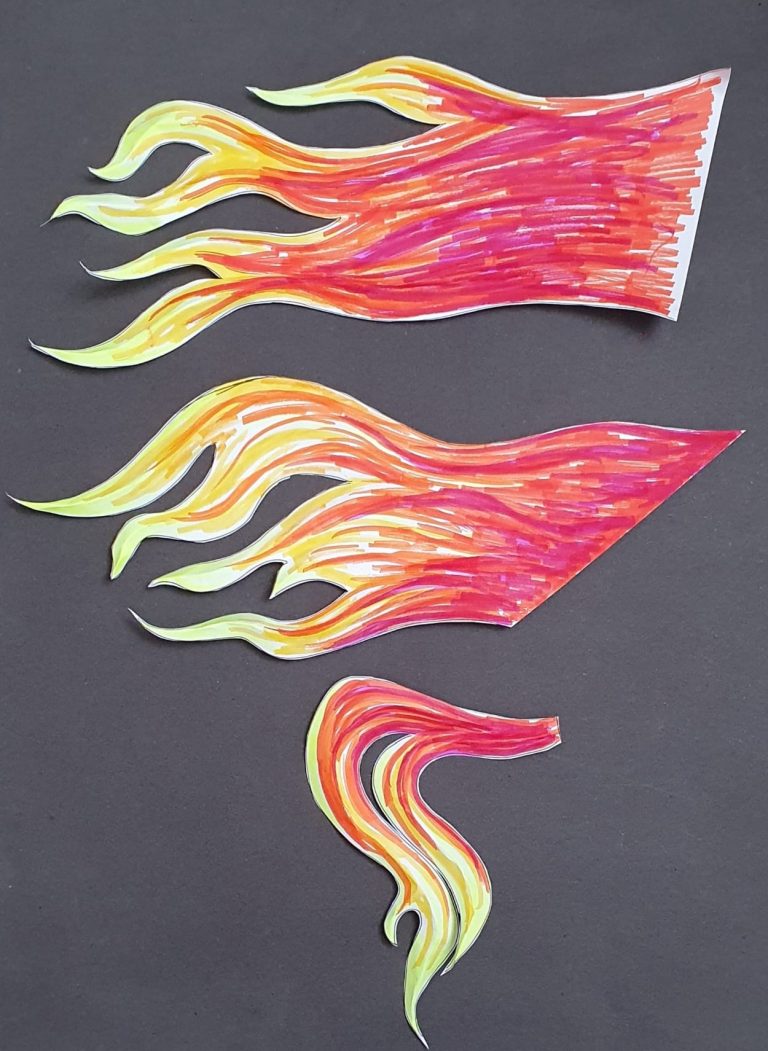
3a. Get another sheet of A4 white paper, draw the flames horizontally as in the picture below. This will be the middle part for the body of the horse.
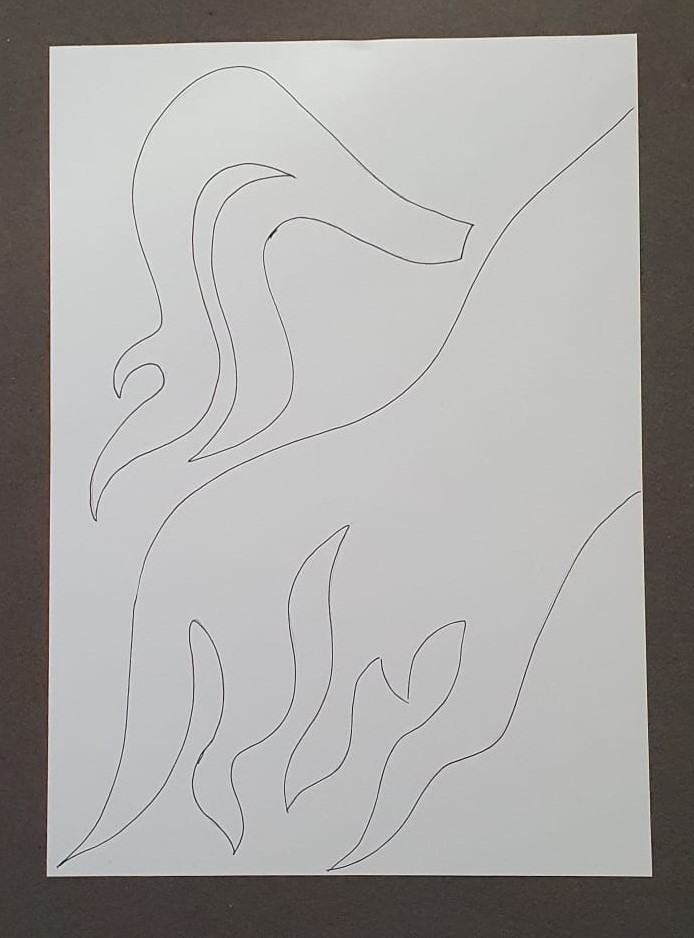
3b. On another sheet of white A4 paper draw another flame shape for the body and draw a horse tail like a flame.
4c. Colour the flame body pieces and cut them out.
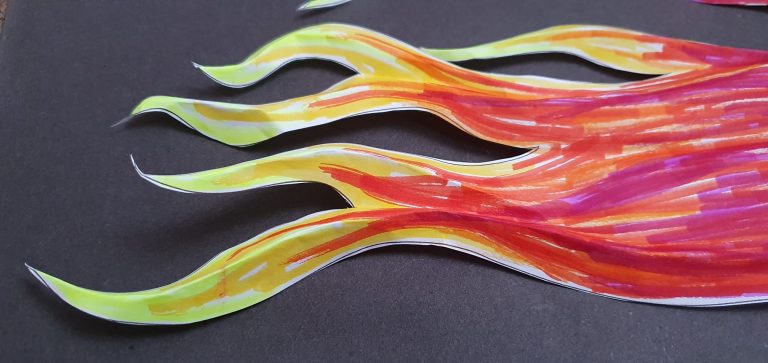
3d. Take all the flame shapes and bend the ends of them in the middle following the curves so they start to look 3D as in the picture below. Do not glue down the bottom of the legs or the edges of flames as you want these to stand out from the green back ground use the images below to guide you.
3e. Join the middle flame piece to the underside of the main horse.
3f. Now add the second flame body shape to the main horse making sure it looks like layers of flames.
3g. Stick the tail in position see below
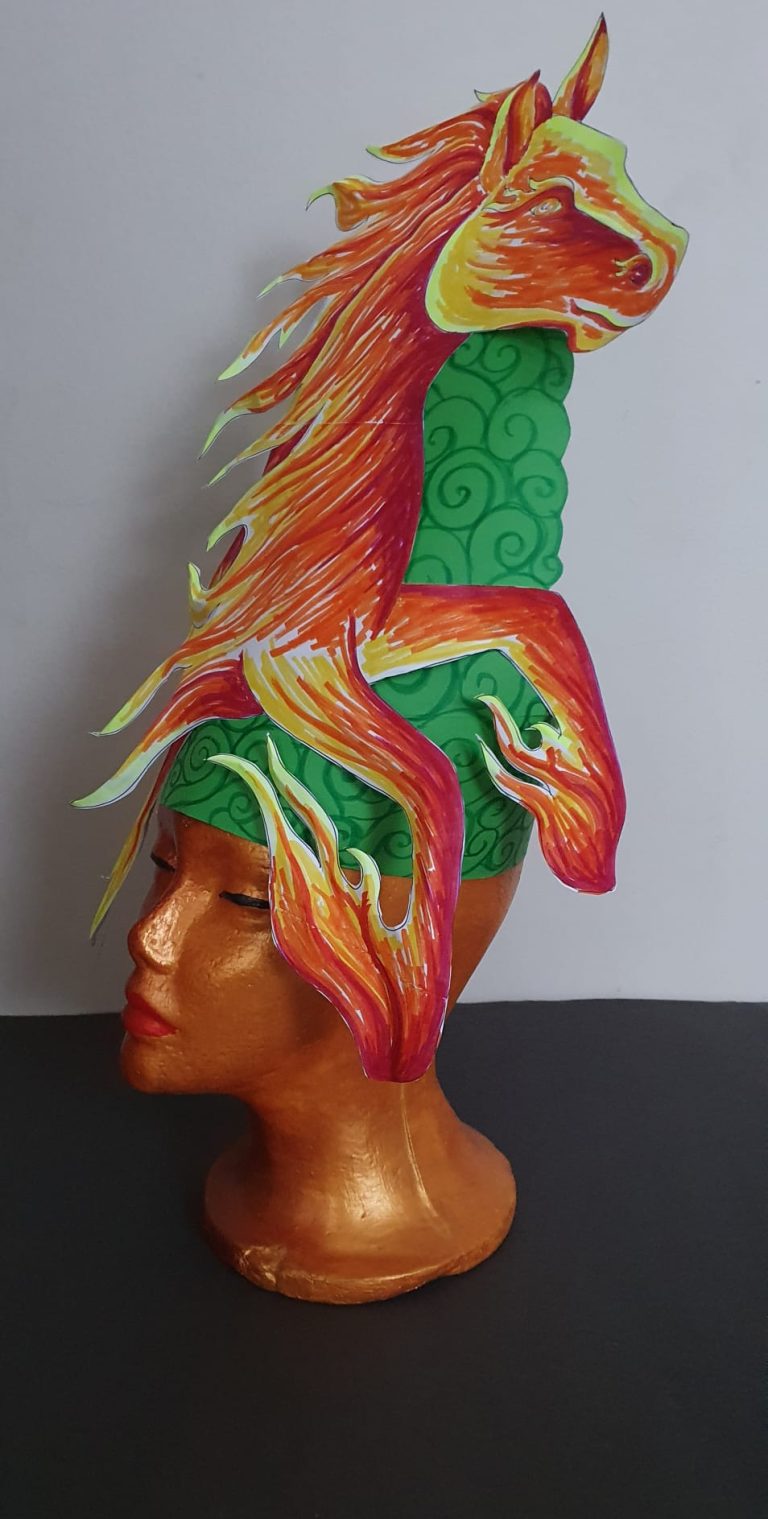
Step 4 -Assembling your headpiece
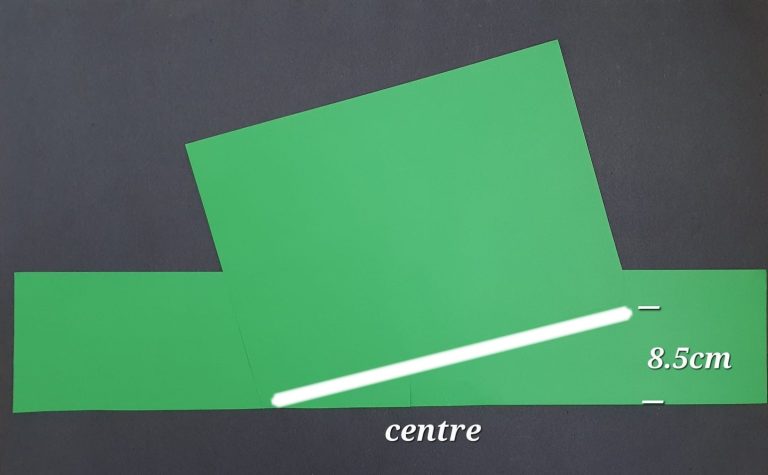
4a. Lay your green headband flat. Place another sheet of green A4 paper horizontally in the centre.
Tilt the right corner of the paper 8.5cm up making sure the left corner is in line with the edge of the headband. Once in position glue together. Use the picture above to help you find the position.
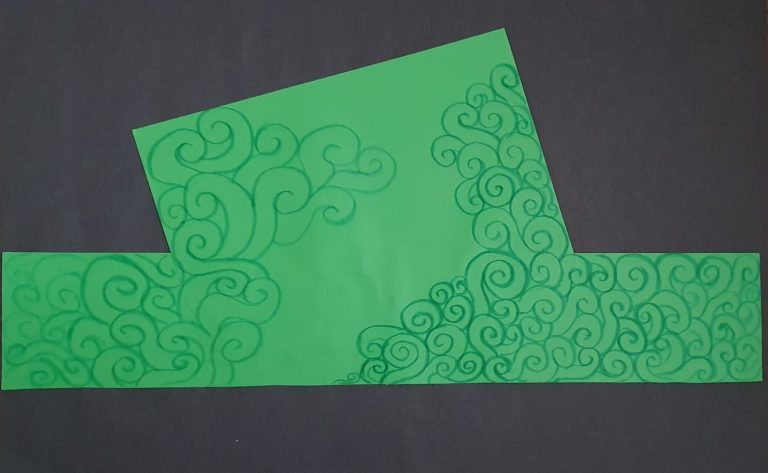
4b. Using a dark green colour pencil or marker, draw some Chinese patterns all over, I chose Chinese swirls.
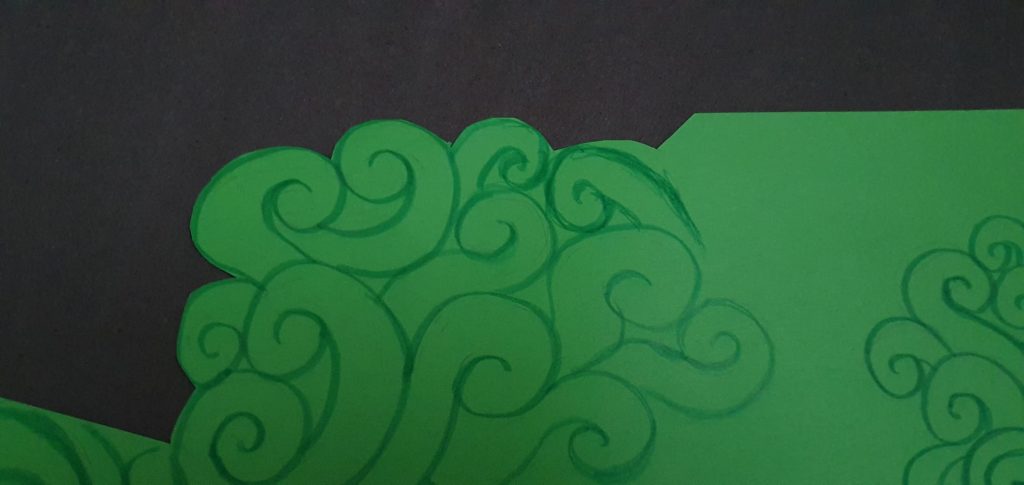
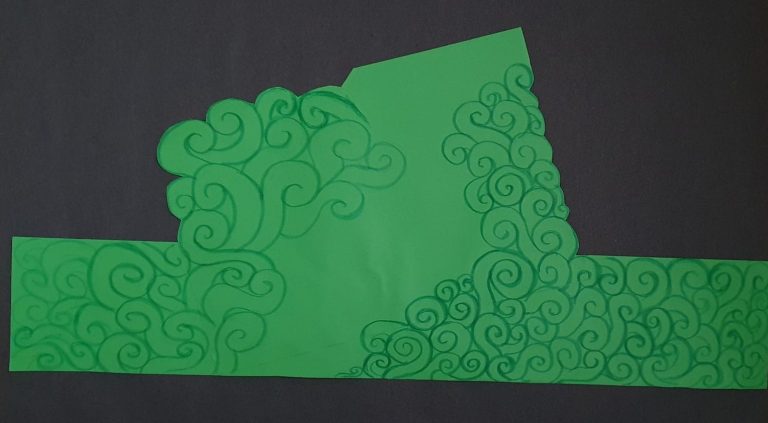
4c. Cut the outline of your pattern on the top and side edges as in the picture below and keep it aside.
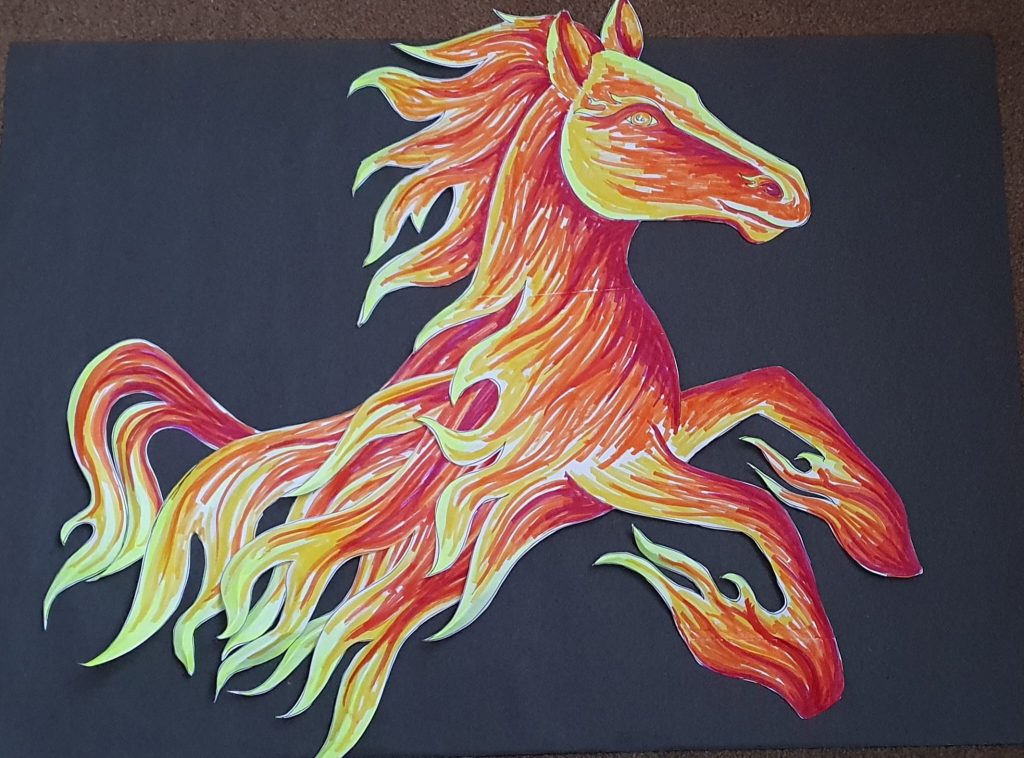
4d. Position your fire horse so that the shapes do not cover the bottom middle of the base of your headpiece.
Once you are happy with it, glue it in place.
Do not glue down the bottom of the legs or the edges of the flames as you want these to stand out from the green back ground use the images below to guide you.
WELL DONE!
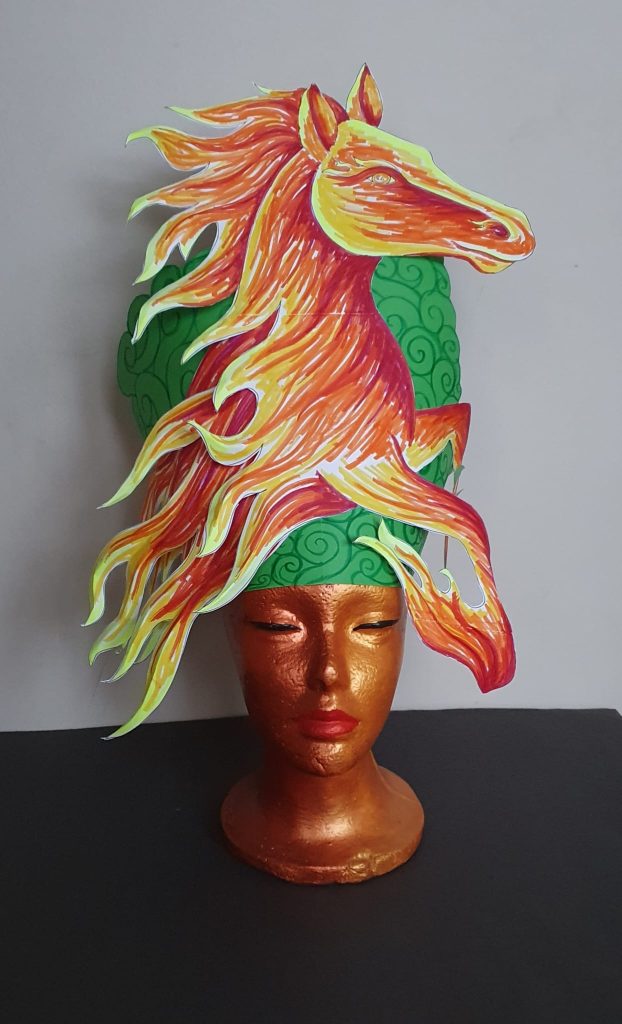
CHINESE FIRE HORSE HEADDRESS
HOPE YOU HAD FUN CREATING YOUR OWN HEADDRESS.
You could add a sparkly element to the Chinese fire horse headdress to make it more creative and visually striking.
We would love to see your fantastic creations so please share your pictures with us on social media @mahoganycarnival.
Thank you for using our template. We hope you enjoyed making your Chinese Horse headdress and we look forward to seeing you on our next creative making carnival workshop.